When your site appears in Google for any search query, it’s called an impression. Then what is click-through rate (or CTR)? It’s the number of clicks on your search results divided by the number of impressions, and then multiplied by 100%. Or much shorter and prettier as a math formula:
CTR = Clicks/Impressions * 100%
Organic CTR is extremely important. Not only does it represent your site’s popularity with the users and the quality of your search snippets’ optimization, but Google also uses it to determine your ranking positions. If your CTR is high, Google moves you up in rankings. If users don’t give you clicks, you’ll be pushed down even from the #1 position as Google will realize your site isn’t relevant to them. That’s why you want your click-through rates to be reasonably high at all times.
What is a good click-through rate? An average CTR of 2-5% is considered good, which may not seem like much. However, don’t forget that there are billions of Internet users, so you are still looking at dozens of millions of potential customers. A CTR lower than 1% is bad news, but if you want to increase yours – you’ve come to the right place.
So let’s begin boosting your CTR.
1. Be on Google’s page #1
The first step of this operation is also the hardest. And yet without it, you can forget about increasing your click-through rates. As the old joke says, the best place to hide a dead body is Google’s page #2. Search results get exponentially fewer clicks the deeper you go.
Fortunately, it doesn’t mean you must overhaul your entire site’s SEO, build a ton of backlinks and get every one of your pages in the top 10 positions – although it’s certainly recommended. There’s a much easier way: start with the pages that are already ranking on Google’s page #1. Improve their click-through rates, and more of your pages will rise in rankings as a result of your site becoming more authoritative.
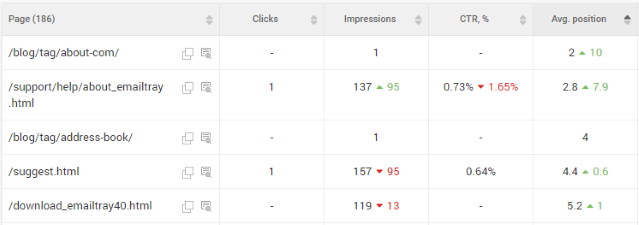
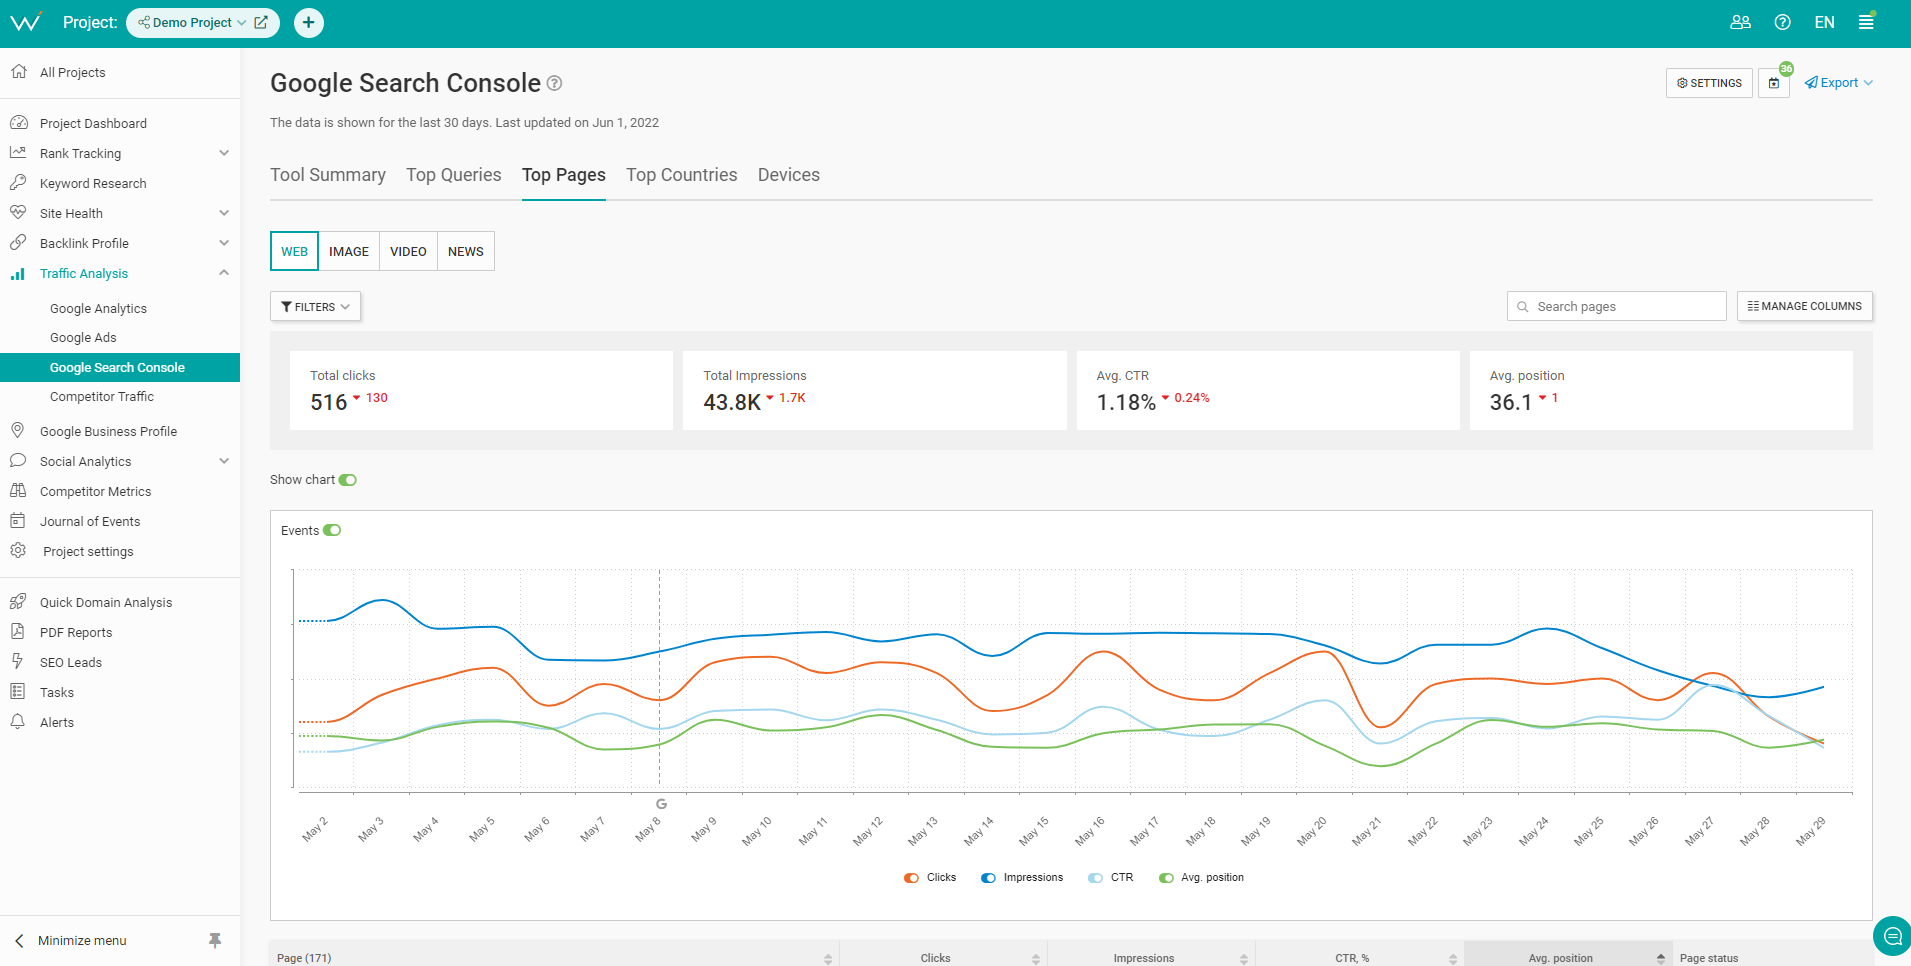
Find your highest ranking pages in WebCEO’s Top Pages report. Just sort the table by the Avg. position column.
2. Optimize pages with low CTRs
With some luck, the previous step will have helped you find more than a few pages to start working with. Now, which ones are you going to optimize first?
Eventually, you’ll want to have them all optimized. But you’ve got to start somewhere specific, and so the best pages to do first are the ones with the lowest click-through rates. They will be the easiest to improve – because, if their CTRs are abysmally low, they must have some obvious flaws that will be easy to fix.
The same report in WebCEO as before, Top Pages, has the information you need. Sort the table by the Avg. position column and jot down the pages with the lowest organic CTR (as displayed in the CTR column to the left). Those have the greatest potential to become your biggest traffic magnets and conversion wellsprings.
3. Optimize for the best keywords
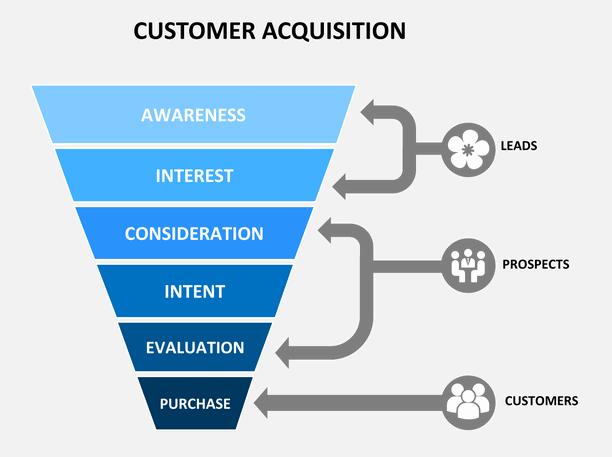
Are you familiar with the purchase funnel? It can be depicted like this:
Starting with awareness of your product and ending with purchasing it, there will be fewer people on each level than on the last. That’s because not all users are interested in sealing the deal to begin with. Getting clicks requires catching the attention of the users who are interested.
That’s where keywords come in.
There are two mistakes you can make at this point:
1. Optimize for keywords which are used by people too far back in the purchase funnel. The chance of those people becoming your customers is critically low.
2. Not optimize for keywords which are used by people near the final level who will probably close. You will miss out on the users who are the most likely to click.
The correct course of action: optimize your web pages for the most optimal keywords. They are the ones that capture the desired user search intent and have a high number of monthly searches. Find such keywords with WebCEO’s Keyword Suggestions tool.
If the pages, whose CTR you are improving, already have the best keywords, great! Proceed to the next step.
4. Make your titles clickable
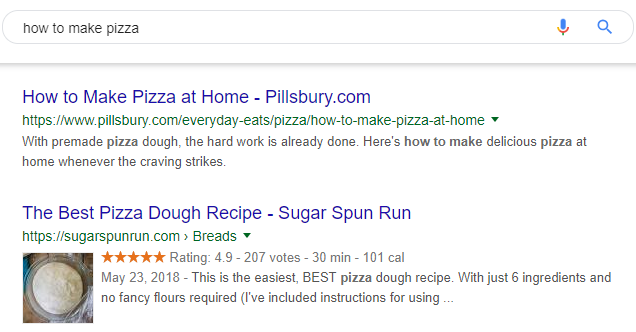
Now we get to the search results themselves. An ordinary search snippet has three elements: a title, a description and a URL address. More elements can be added through the use of structured data, but we’ll get to that later. For now, we’ll cover titles.
What makes a title clickable?
1. You must not have any duplicate page titles on your own site, and you should avoid sharing them with other sites. A non-unique title will blend in with the rest and not attract any clicks.
2. Matches the page’s content. If the title describes one thing and the page has something different, you will lose clicking users.
3. Contains a keyword. You already know that the best keywords reflect user search intent. Your titles should include at least one such keyword, preferably right at the beginning.
4. Includes attention-grabbing words. Brian Dean of Backlinko recommends using these words where appropriate:
-
- [X% Off]
- (Updated)
- [Infographic]
- (And Why It Matters)
- [New Research]
- (Case Study)
- [Interview]
- (New Guide)
- [+Checklist]
- (With Examples)
- [Video]
- (Trusted by X Clients)
- [Flowchart]
- [Visual Guide]
- (No Fees)
- [Template]
5. Is specific. Which search result would you rather click: Buy iPhone or Buy iPhone 7 32GB Black in U.S.? The more specific, the better.
6. Stays within the character limit and isn’t cropped.
7. Uses emotion-invoking words.
8. Has symbols that increase clickability: colon, brackets, question mark, percent symbol.
9. Has numbers.
10. Includes words “why”, “what”, “how to”. Note that “how to” tends to be less effective than the first two.
11. Composed like this: number + emotional hook + type of content + subject. Example: 20 Unreal Facts About Your Favorite Food.
And another easy trick to make your titles clickable: find posts with a lot of user engagement in social media. Those posts’ titles may provide some great examples of what you need.
5. Make your descriptions clickable
In terms of making them more clickable, meta descriptions need to have many things in common with titles:
1. Uniqueness
2. Matching the page’s content
3. Containing keywords
4. Having power words
5. Abiding by the character limit
And there are two more requirements that can make or break your description.
6. Include a call-to-action.
7. Appeal to specific customer types (or personas). This part will require some experimenting in order to find the persona which gets the most clicks.
6. Make your URLs clickable
URLs are much easier to optimize. For one, they need to have much fewer things in common with titles and descriptions: be unique, match the page’s content and contain keywords. And then there are only a couple more factors:
1. As in, consisting of actual words instead of looking like gibberish of random symbols.
2. A single glance at your URL should be enough to understand what the page is about. The only acceptable exception is the home page whose URL often contains just the brand name.
7. Get rich snippets
Now, you’ve definitely seen search results which had more elements than the main three. Rich snippets are results which also have images, rating stars, review scores, products’ prices and so on. Those additional elements can only be added by using structured data on your site.
A study by Search Engine Land found that rich snippets get 30% more clicks than normal boring search results. I’ll bet you would fancy a few experiments with structured data now. There’s no better place to get started than its official website: schema.org.
8. Get featured snippets
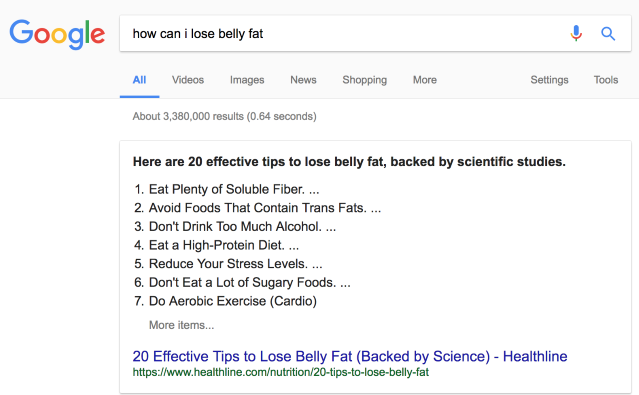
Users often click on the first thing they see in Google. It’s why Position 0 results get lots of clicks and tons of hate. A study by Ahrefs revealed that the top organic results get 6.4% fewer clicks on average when there’s also a featured snippet displayed.
What can I say? All is fair in love, war and Internet marketing.
Pages at Position 0 usually already rank in the top 10 positions. Barring YouTube video snippets, you can get these for your site:
- Paragraph snippets
- Numbered list snippets
- Bulleted list snippets
- Table snippets
The first three types of featured snippets require you to optimize your page for a long-tail question keyword (such as “how to repair a kitchen faucet”) and provide detailed information on the subject. Since it’s often easier to do in the form of a list, numbered and bulleted list snippets are very common.
Table snippets are given to pages which have tables and are enhanced with structured data.
9. Get in the Knowledge Graph
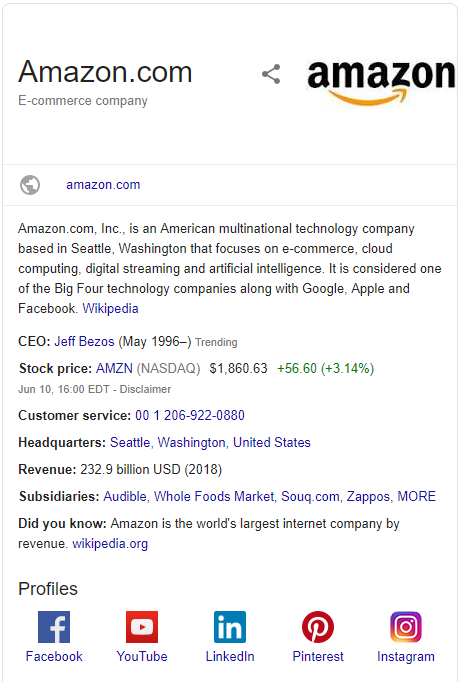
Google’s Knowledge Graph is reserved for brands and businesses. It’s big and impossible to miss, which makes it a powerful click magnet – not to mention that it makes you look like a huge deal.
How do you get a Knowledge Graph panel for your business?
- Use structured data on your site
- Get a Wikipedia article about your business
- Create a local listing in Google My Business
- Get featured in Google News and other online news
- Have business pages in social media
10. Get in Google’s local 3-pack
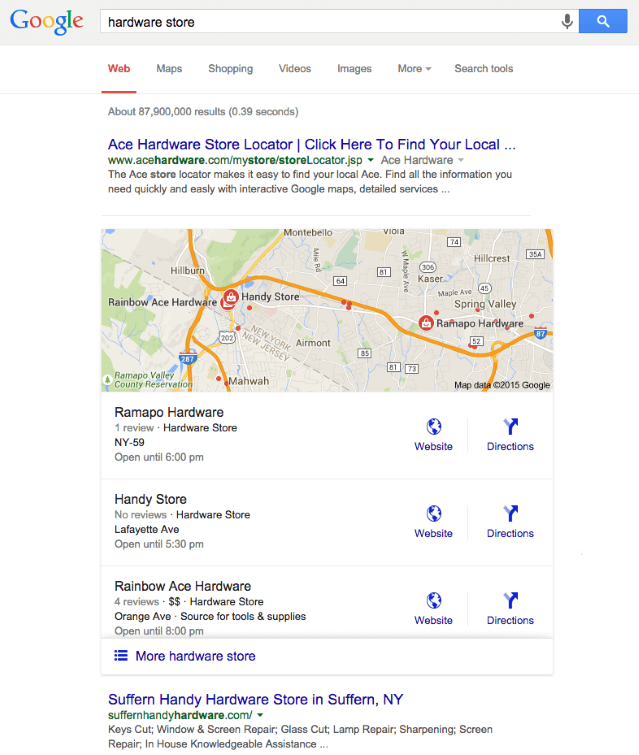
Have you ever noticed that block with three results under Google Maps when you Googled a product or a service? That’s the 3-pack. And of course, being placed above the organic results, it steals clicks from them just like featured snippets do.
Follow these steps to get your business in the 3-pack:
1. Create a Google My Business listing;
2. Fill out your business information on GMB and on every other website where you have a listing;
3. Keep your information consistent across all websites (and be sure to update it everywhere if anything changes);
4. Collect as many positive reviews from customers as you can. This will also make your result in the 3-pack more clickable on its own, as a positive rating inspires trust.
11. Get sitelinks
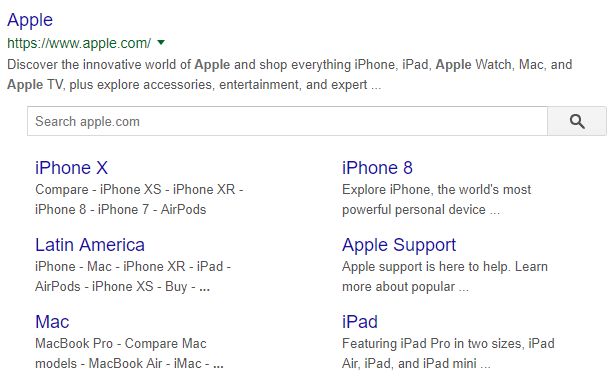
Sitelinks are additional links that appear in your search snippet under its main body. They look like this:
They can include up to 8 links, not counting the “More results from…” link. You can view them as your site’s navigation built right into your Google search result.
As you can imagine, that’s a tremendous benefit: not just one, but multiple links pointing to your site, all in one ranking position. Sounds like you should absolutely get those for your own site, right? But of course, there’s a catch. Sitelinks are created automatically by Google’s algorithm, and they are completely out of your control.
Still, sites with sitelinks tend to have a few things in common. If you meet these requirements, Google might just decide you deserve sitelinks.
- Rank #1 for your brand name
- Have an efficient, easy-to-use site structure
- Have links to all important pages from your home page
Since you can’t decide which of your pages Google will choose, the only correct way to optimize them is after they start appearing in your sitelinks – whichever they are. Each sitelink is made of a title and a description, both of which have much smaller character limits than usual. Therefore, if you want to make them more clickable, you’ll need to put a call-to-action right at their beginning.
12. Add breadcrumbs
It’s always recommended to add breadcrumbs on your site to improve navigation and user experience, but you can also add them directly in your search result.
Breadcrumbs have a few things in common with sitelinks. They put several additional links to your site in your search result, they make your search snippet eye-catching and, of course, drive extra clicks. But the best part? Unlike sitelinks, you can actually add them yourself!
There are two ways to create breadcrumbs: a) make a list of links via HTML or b) use structured data. As you can see in the example above, breadcrumbs replace your page’s URL, so make sure every step is descriptive!
13. Use tools to preview your search snippets
Chances are, your perspective won’t be as reliable as the users’. But that doesn’t mean you shouldn’t check out the attractiveness of your search snippets with your own eyes. You absolutely should.
Here are some free tools which can generate previews of search results:
- Yoast SEO plugin in WordPress
- SERP preview tool by Spotibo
- Google SERP Simulator by TechnicalSEO.com
- Google AdWords (essential if you are running ads)
And be sure to check how your snippets look both on desktop and mobile devices.
14. Improve your loading speed
Yes, you read that right. Now you’re probably wondering what this has to do with making your search results more clickable. Well, it’s less about driving clicks and more about making sure they work.
Do you know when exactly a click registers? If you just answered “when the user clicks”, you are wrong. A click registers after the user clicks and when the web page actually loads. Therefore, if the user clicks and closes the page before it finished loading, the click doesn’t count.
That’s why you need to make sure your site loads quickly – to avoid that exact kind of a situation.
- Host your site on a fast server
- Host your site on a content delivery network
- Optimize your page code
- Optimize your images
- Merge elements which can be merged (such as multiple images going one right after another or CSS files)
- Enable browser caching
- Use compression software like Gzip
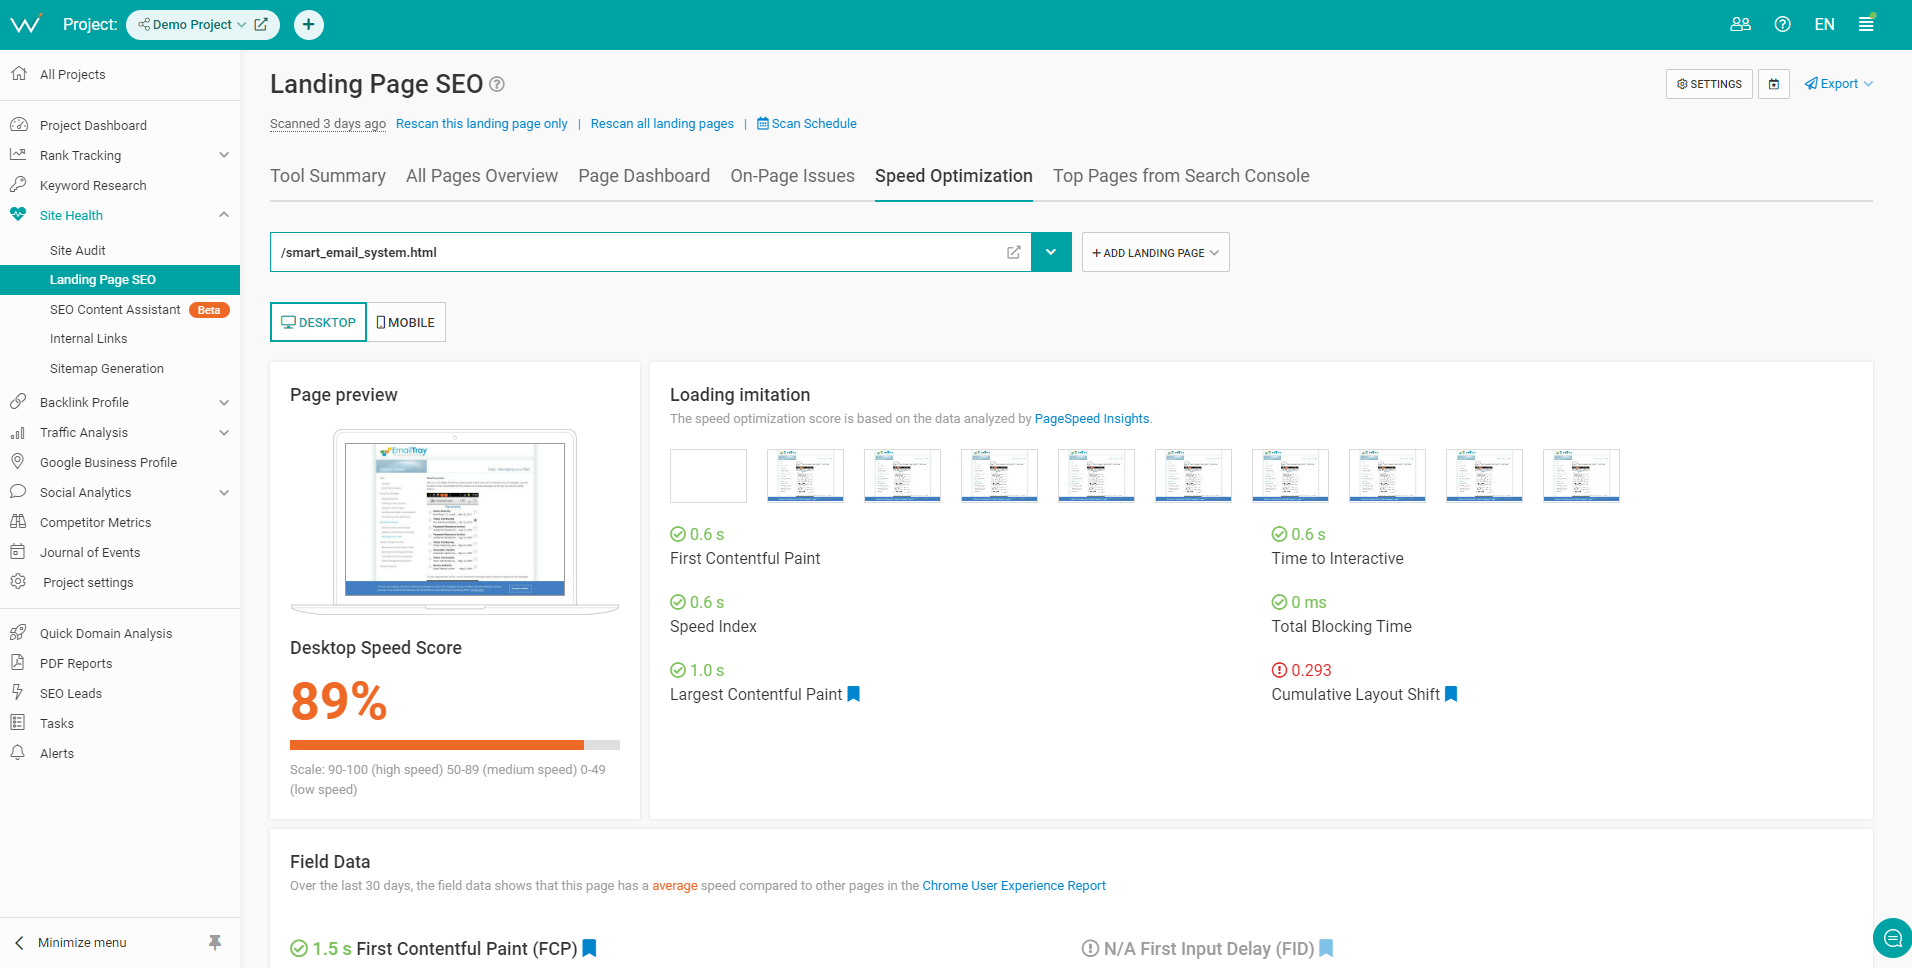
If your CTR is low, you should check your site’s loading speed to see if it’s a factor. Test it now with WebCEO’s Speed Optimization tool.
15. Monitor your progress
The first step was the hardest, and the last is the easiest. The only thing to worry about at this point is that your efforts might not have worked. But you won’t know until you’ve checked.
When you’ve added your site to Google Search Console, connect it to your project in WebCEO and start drawing data from Google. The Top Pages report is automatically updated daily and displays the data for the last 30 days. Be sure to check it often!
